


Reporting within SDMS SDMS V Staff Development and Learning Management for Windows already provides a large range of extensive and flexible reports covering most of the day-to-day operations of the Staff Development and Training Department. Each of these standard reports can be customised by selecting the range of data reported on – dates, types of training courses, types of staff, type of groups/organisations etc. providing day to day users with easy access to information. In addition, the fixed outputs can be modified before printing in the Report Viewer and Editor which provides word processing functionality within the reports module. But now, reporting has been further extended by offering a fully integrated Report Generator within the SDMS V Staff Development Software for ad hoc report writing on data held in SDMS Software. Access to Pre-set Data View
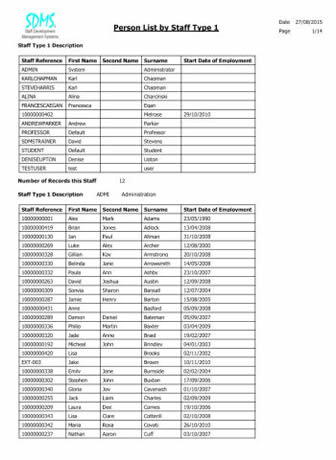
Provided with the Report Generator, are a set of Data Views which can be used for generating reports. The easy to use Report Wizard allows you to choose the Data fields you want to include in the report and then customize the report: |
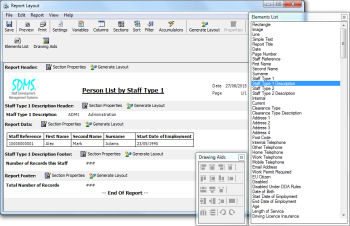
Design New Reports With the Integrated Report Writer, users can access the data, design and write their own reports, in their style, when they want, in a format they need. This easy to use Report Writer enables the user as well as the IT professional, to design and produce high quality reports.
|
|
|
With its clear user interface and extensive help section; the Report Generator is a simple and easy to use software tool which will help you greatly enhance the business benefits already supplied through your use of SDMS V Staff Development for Windows. Given the limited technical resources in most training departments and their high cost; SDMS V Report Writer gives power to the end user to write their own reports without recourse to scarce IT or programming skills. Once a report has been created in can be copied and saved under a new name to be used as the basis for the next report that you wish to produce. |
|
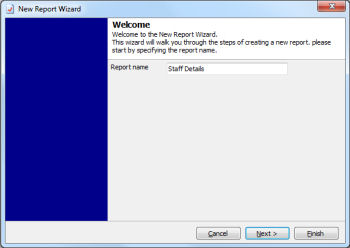
Steps in Creating a New Report Creating a new report can be achieved by using the in-built report wizard allowing you to choose the information you wish to include by following six simple steps:
When using the wizard at each of the stages; you can choose the particular items the report should be built around or move straight onto the next stage. Once all the steps have been completed you can then see the final design of the report that can be saved and amended as and when required.
|
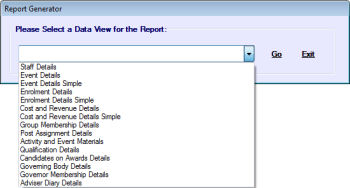
Setting Up the Report The first step involved in the process of creating a new report, is to select the data view that defines the information you wish to report on. Once the data view has been selected, then create the new report and give it an appropriate title. The title of the report once chosen can be changed once the report has been saved.
|
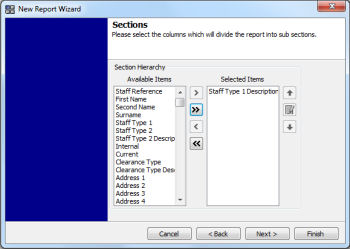
Defining the Report Sections Once all the appropriate fields have been selected, you can then determine whether the report should include any particular section breaks. These can be used to break the report down into particular groupings. |
|
Selecting the Report Columns The next step is to select which of the fields are going to be included on the report. The wizard presents you with a list of all of the available fields within the chosen data view and allows you to determine which of these are to be included as columns in the table that is generated.
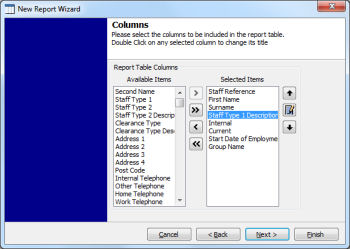 Having chosen the columns, the order of them can be determined by the order within the selected items. Field names can also be renamed so they are meaningful to the user for the particular report.
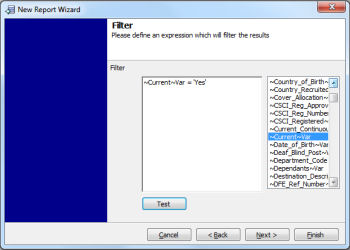
Renaming a field to be included on the report Setting up any Filtering for the Report When the report is generated from the software there is no form of filtering or customisation. Therefore, the filtering stage can be used to determine which records should be included on the report. |
For example, you may wish to create a staff list report that contains details of the member of staff’s main job. By including a section that contains the details of the job title you can then see details of all the staff who are in that particular job.
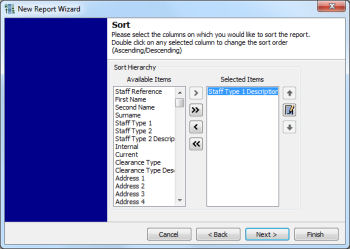
Defining the Order of the Report |
To ensure that the information which appears on the report is in the correct grouping, and the details for a particular breakdown or member of staff are kept together, the Sorting stage allows you to define the order of the records by choosing to sort the report on particular fields. Including additional fields will ensure that when the first part of the details are the same then the additional fields will be used to order the records on the report.
|
|
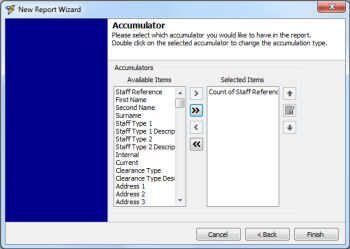
Setting up a Total for the Report The final stage of the wizard allows you to select and include any totals on the report. You can select to count the number of records that appear on the report within the given sections that have been included, find the highest or lowest value for a particular field or total the contents of a particular field.
|
|
For example, you might want to only include the details of particular types of staff on the report or only those members of staff who have been employed within the last six months.
|
|
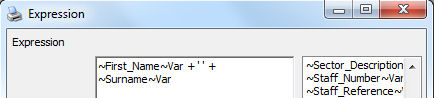
Creating New Variables for the Reports When creating a new report, you may wish to create a new field based on the contents of other fields within the report. One example of this is to create a formatted name field which combines the member of staff’s first name and surname so it can be added to the report. These fields can be generated within the report and then included on the report layout so they appear on the report output when the report is run.
|
|
|
|